Christopher from Art Kingdom shows you how to make leaf shaped patterns using actual leaves as stencils and spray bottles filled with India Ink mixed with 100% alcohol in 7 easy steps! This art activity is great for home school because it involves the natural sciences and the visual arts (maybe even some chemistry with the alcohol solution). The results are beautiful, use as many colours to layer you India inks as you'd like!

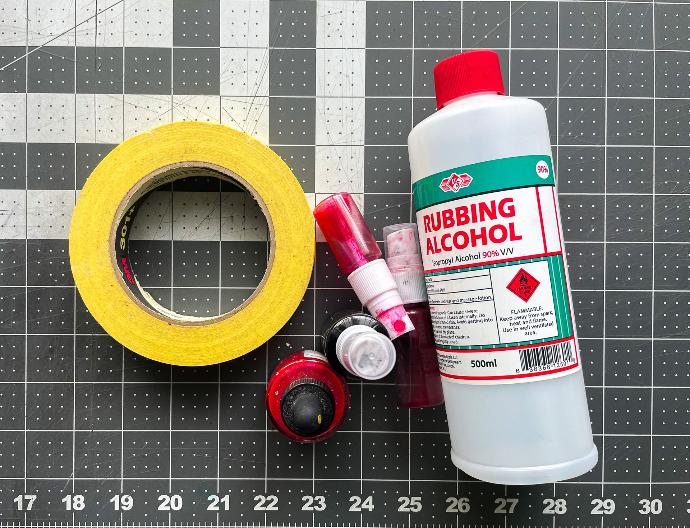
List of Materials
- India Ink (Multiple Colours)
- Water Colour Paper
- Spray Bottles
- Isopropyl Alcohol
- Leaves
- Tape
- Markers
Let's Get Started
Step 1
Fill your water colour page with lots of colourful marks!
Take your markers, or some colour pencils, or some crayons and fill your page with plenty of colourful marks and patterns. Use as many colours as possible but for now let's try to avoid black.
Step 2
Place your leaves on the page, space them out and stick them down.
Spacing your leaves out is important! You want to use your designer's eye to space your leaves it out in a balanced, appealing way. It's okay if the leaves overlap or touch, but you want make sure that the space in between the leaves look interesting! Make sure to stick down your leaves because we don't want them to move around during our next few steps.
P.S. when doing this activity with young children (which it's perfect for, but you're unsure about the rubbing alcohol and ink just swap for water and water soluble paint) you may want to roll the tape up for them before you all begin so it's easy for them to stick it behind the leaf and go without having to worry about all that rolling.

Step 3
Mix the rubbing alcohol and one colour of ink in a spray bottle.
Use about 3 parts alcohol to one part part ink. No need to be a chemist to understand this part. The more ink you use the bolder your colours will appear, so you really can just mix to suit.
Step 4
Spray the mixture over the entire page.
Try to spray over the page letting the mist fall above the leaves. If you spray them at an angle the spray will get under the leaves and your stencil won't look as clean.
Step 5
Remove the leaves to reveal your stencil!
Save your leaves! Be careful while removing your leaves we're about to repeat steps 3 & 4.
Step 6
Repeat steps 3,4 & 5 with a different colour ink.
Do this as many time as you want with as many different colours of ink that you want.
Step 7
Add finishing touches and improvise.
This is an additional step that isn't necessary but totally rewarding. Take a good long look at your art piece and add paint or collage elements in places that you think can use some extra colours. Maybe add some extra letters, or shapes or maybe even some plant pots since we are working with leaves.
P.s here's a pro tip: This type of stencil works with any object that you are willing to get ink on, and it works especially well with weighted objects as you won't need to stick them down!
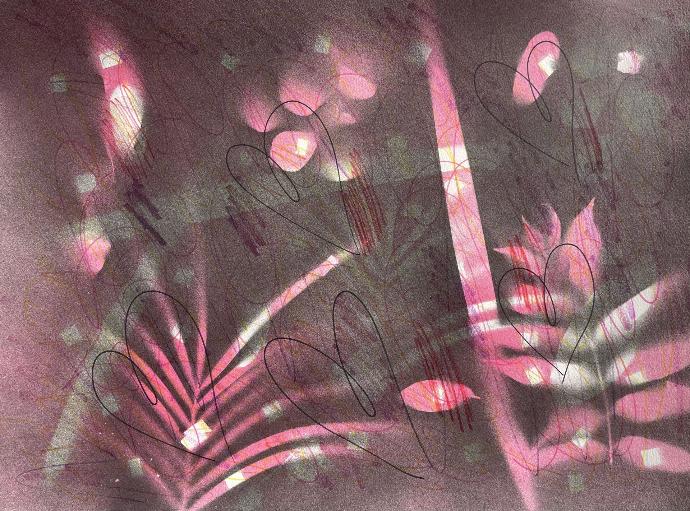
The Final Piece
If you're a visual learner and want to see this activity demonstrated head over to Light Blooms Art YouTube page. Click for video!
If you're interested in more Visual Art resources to inspire artistic values sign up for our News Letter!